Working at height remains one of the most dangerous activities in the UK construction and maintenance sector. Older roofs can be especially dangerous, with many being constructed from materials that were never designed to withstand modern safety demands.
The HSE estimates that seven people are killed from falling through a fragile roof or fragile roof light each year, which highlights just how important it is to have robust safety measures in place. Just one slip could result in a life-changing injury for your staff member, alongside costly legal claims and reputational damage for your business.
In this guide, we’ll talk you through how to safely retrofit roof guardrails, and explore how our modular solutions can help to safeguard your people and protect your property.
What are the regulatory requirements for retrofit projects?
Before beginning your retrofit, it’s vital that you understand the regulations surrounding this type of work. The regulations for retrofit fall protection in the UK have become even stricter in recent years, with different types of guardrails needing to comply with different standards. Permanent fixed guardrails must comply with BS EN ISO 14122-3:2016, whereas freestanding systems must meet BS EN 13374:2013 and BS 13700:2021.
If your system doesn’t comply with these standards, you could risk legal penalties, as well as compromising your workers’ safety.
How to retrofit roof guardrails in 5 easy steps
Step 1: Assess your building’s roof and edge conditions
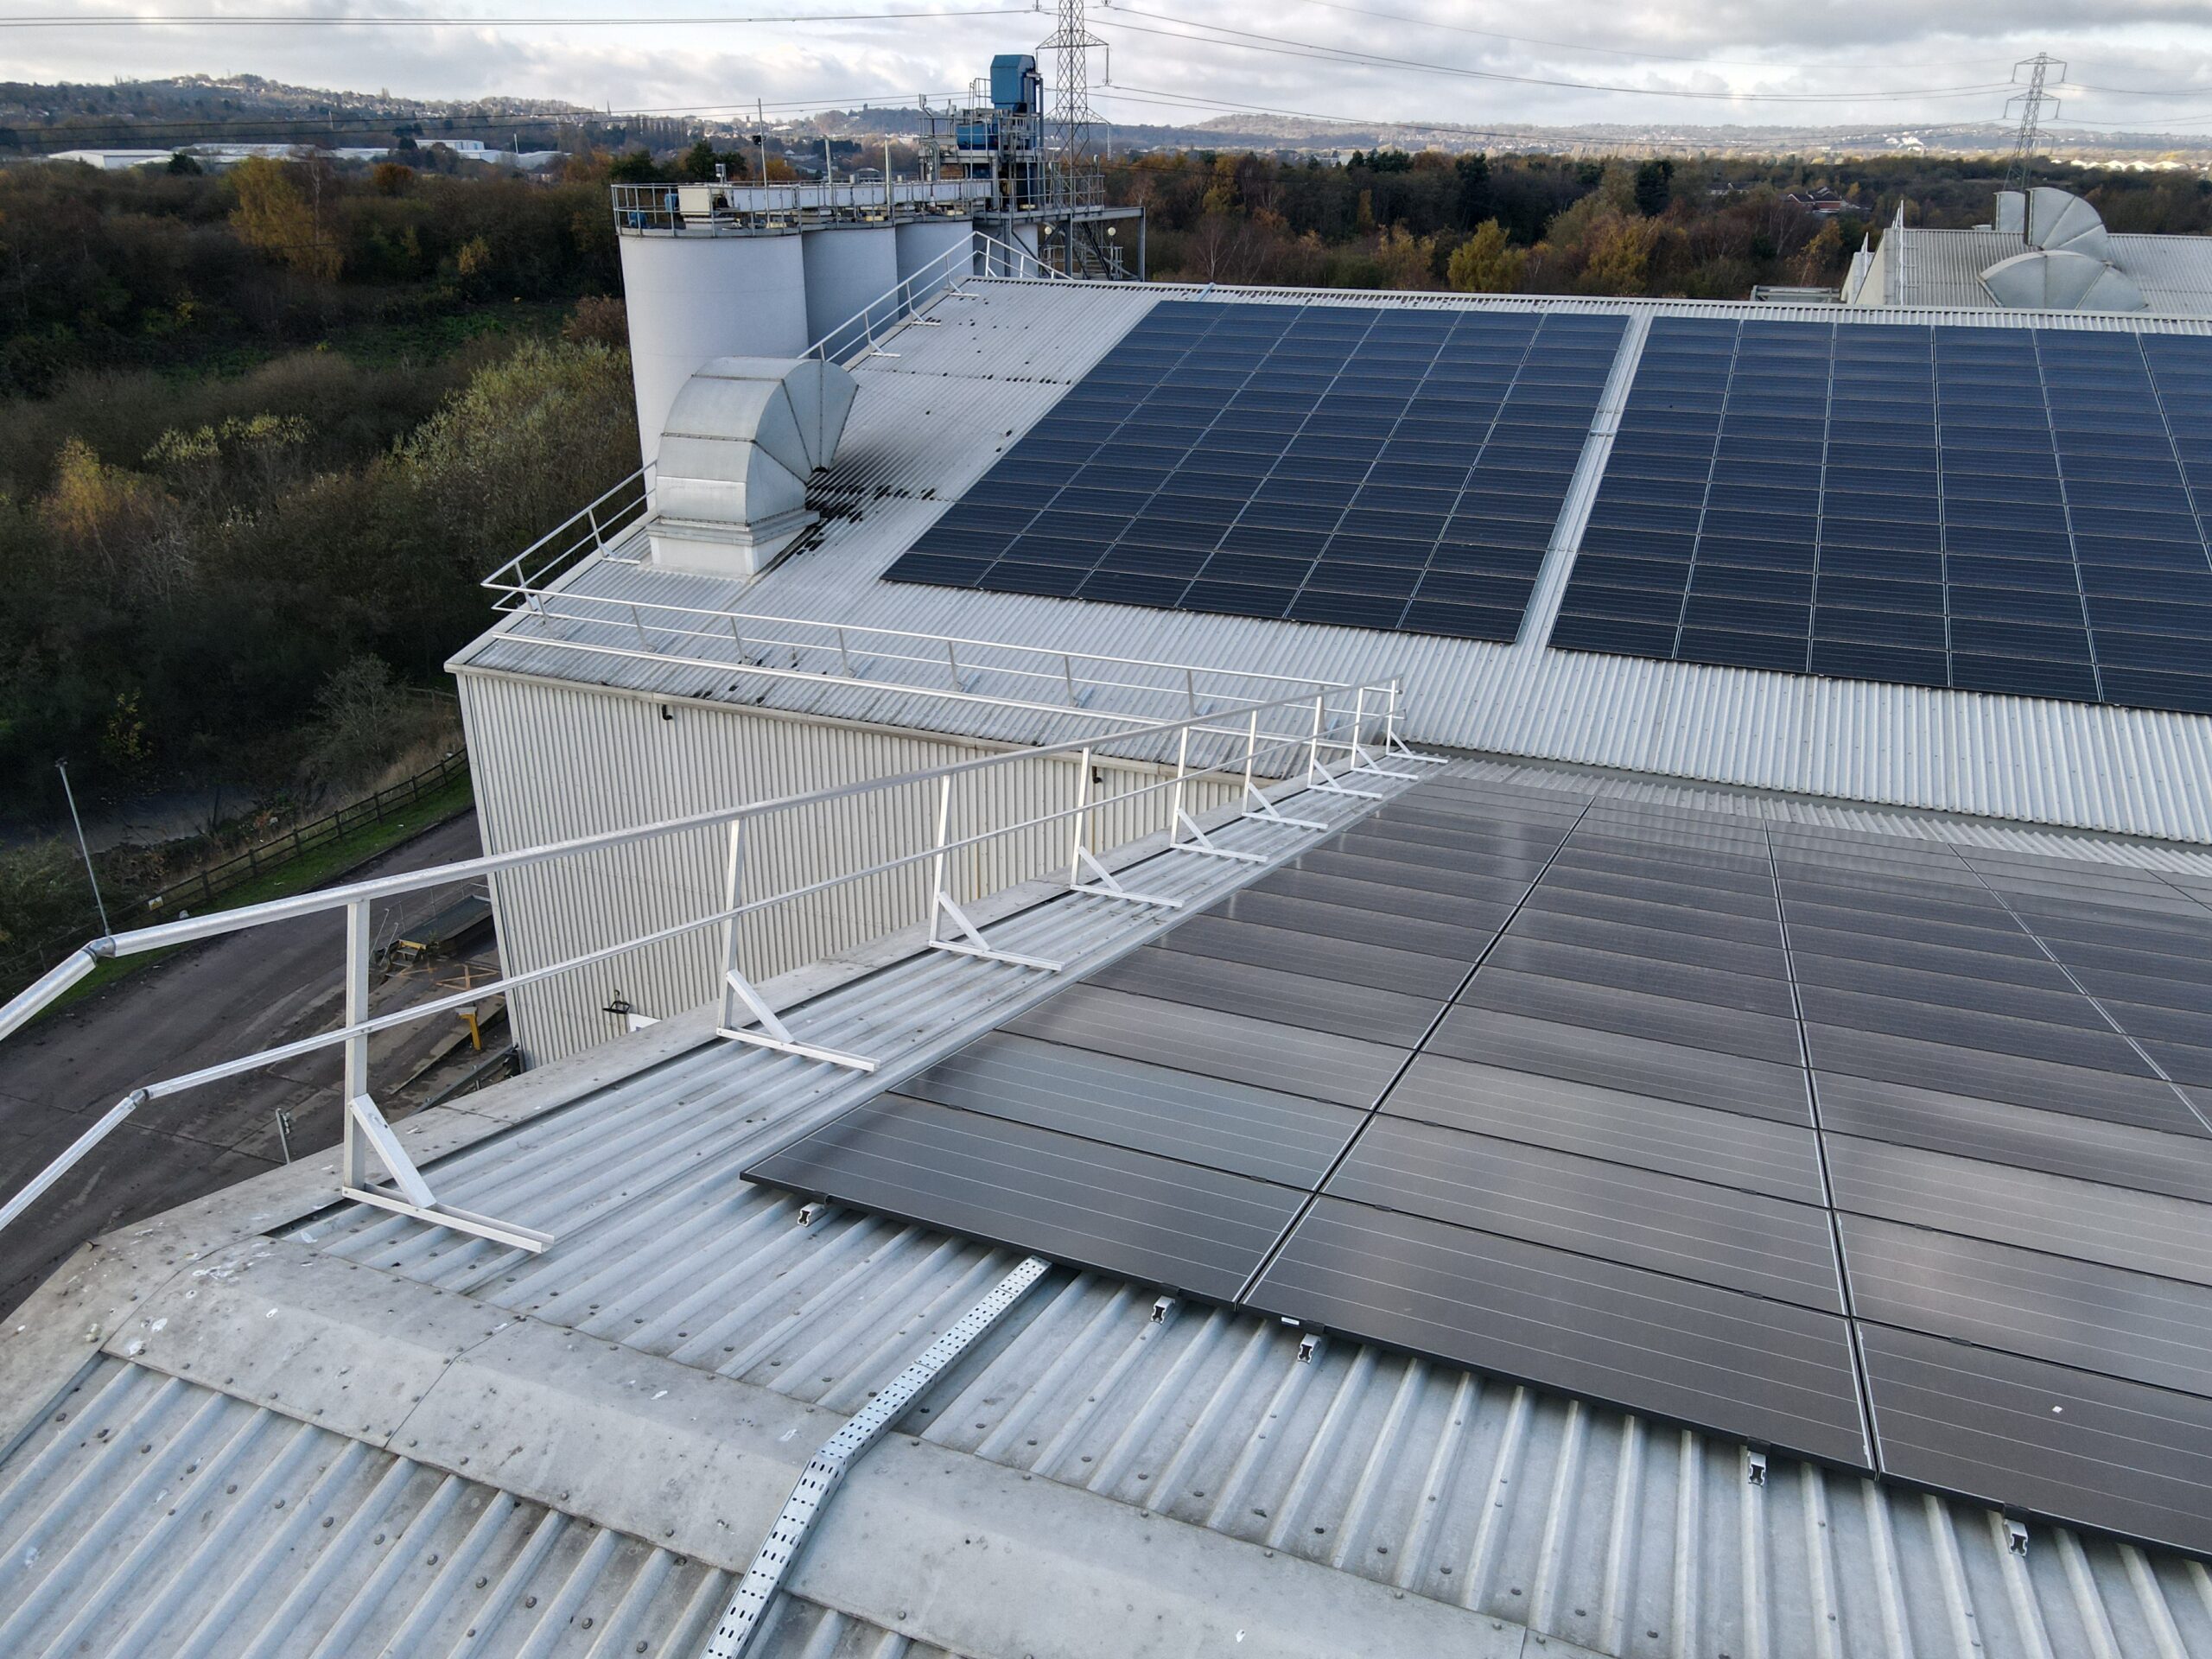
Start by conducting a thorough site survey. Inspect the roof’s pitch, materials, parapet height, and any potential structural attachment points. For example, is it a flat or pitched roof? And are there any delicate membrane surfaces or historical features? These factors will influence whether you need fixed, side or top-mounted, or freestanding guardrails.
It’s also worth noting that if you’re working on a heritage or listed building, you must take care to preserve the aesthetics of the building when retrofitting your roof guardrails.
Step 2: Select the right guardrail configuration
Once you’ve assessed the building’s roof, you’ll need to choose a guardrail system that suits your requirements. At Katt Safety, we offer several modular bolt-on guardrail systems that are perfect for retrofitting onto existing roofs.
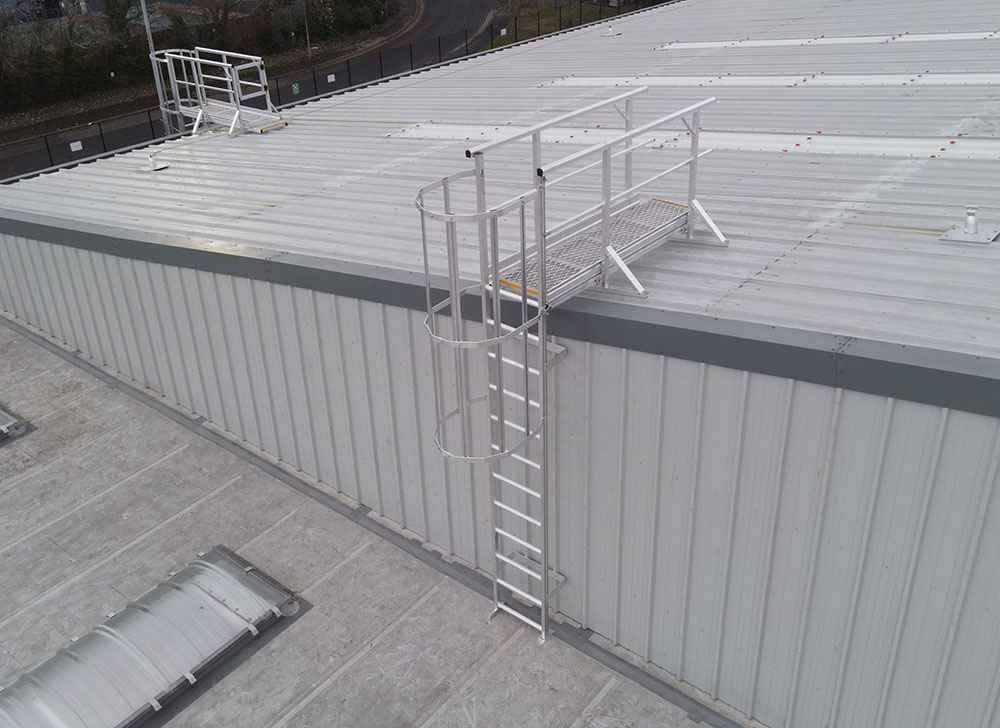
Our Sentry fixed guardrail systems provide strong, secure, long lasting protection on your roof. The system is secured into the roof structure with rivets or self-drilling fasteners, and can be completely adjusted to suit your location and roof design. It’s quick and easy to install, and there’s no need to lift counterweights to the roof level – helping to reduce manual handling tasks for your team.
On the other hand, our EDGEPRO freestanding guardrails don’t need any structural work. The guardrails are held into place by cantilever weights, making them the perfect solution for fragile or protected roofs where penetrative fixes are prohibited. The modular design makes it exceptionally easy to install, with all posts supplied pre-assembled – ensuring minimal disruption to your daily operations.
Step 3: Plan your installation
After you’ve selected your guardrail system, it’s time to plan out the installation.
First, you’ll need to get structural and compliance sign-off. You’ll need to engage with a structural engineer who will be able to complete the relevant calculations and confirm the suitability of the system.
Next, map out the layout of your brackets and posts. The posts should be spaced no more than 2 metres apart, with the corners no more than 300mm from a support post or rail overhang. This ensures the load will be distributed evenly, which improves the longevity of the system.
Once the layout has been mapped out, it’s time to install the system. Our fixed systems only require rivets or fasteners, making them quick and cost-effective to install. On the other hand, our freestanding setups rely on cantilever weights, meaning they can be fully operational in a matter of days.
Finally, you’ll need to think about ancillaries. Additional accessories like toeboards, hatch guards, mid-rails, and powder-coating will ensure that the guardrail seamlessly integrates with the aesthetics of the roof, which is especially important for historical or listed buildings.
Step 4: Implement an inspection and maintenance regime
Compliance doesn’t end once your guardrail system has been installed. As mandated by both BS 14122-3 and BS 13700:2021, you must regularly inspect the system to ensure it remains fit for purpose. You’ll need to maintain a system technical file and keep your inspection records accessible for future audits.
Step 5: Document the retrofit
It’s vital that you record the entire retrofit process, making note of your site surveys, design decisions, installation, inspection dates, and warranty details. You can then share this document with your key stakeholders, including facilities teams, building owners, and compliance officers, to demonstrate that the system is safe and meets the standards required for certification. This also provides a valuable reference point if you wish to carry out any future upgrades.
Partner with Katt Safety for your roof retrofit project
If you need to add safety rails to your roof and are looking for a reliable partner to help you get the job done, Katt Safety can help. Our permanent roof guardrail systems are specifically designed to keep your employees safe whilst working at height. We can supply our systems in just 2-3 days from the date of order, and are always on-hand to offer expert advice when it comes to choosing the right system for your roof.
Get in touch today to discuss your upcoming roof retrofit project.